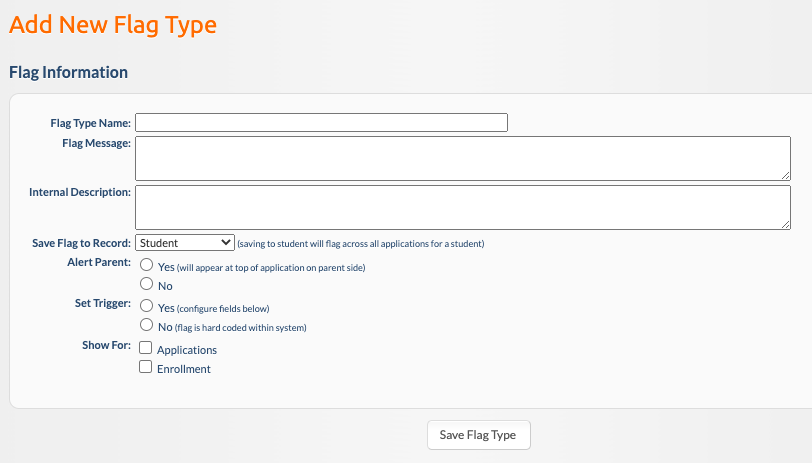
You can follow these steps to create a flag:
1. Go to SETTINGS module
2. Click on the Custom Data tab
3. Click on Flag Types
4. Click to "Add New Flag Type"
5. Fill out the following:

- Flag Type Name - Short Name that will show on the Flag Type filter on the application management screen.
- Flag Message - This message will appear next to the flag name when reviewing flags on the admin side or if the flag is set to show to parents.
- Internal Description - Only used for internal reference of the flag
- Save Flag to Record - If the flag would be different on a program by program basis, save to the "Application" record. Otherwise, you can save to the "Student" record.
- Alert Parent - If selected yes, an alert will appear on the parent side when they trigger this flag.
- Set Trigger - If you are able to create this flag, select Yes. If this is a more complex flag that would need to be hard coded, contact your Customer Success Manager for development help.
- Show For - Select the process that the flag is relevant to.
When selecting "Yes" to "Set Trigger", you will be presented with the following:

This area is where you will be setting specific triggers for the flag to appear. For example, if I wanted to flag all male applications, it may look something like:
Students gender = male
Another scenario is if a flag should be thrown if a parent uploads a document. In this scenario, enter the field name and the condition dropdown can be "is not empty". This means as soon as a file is saved, this will trigger a flag.
Use the SETTINGS >> Forms >> Application as an area to reference the field name and what record it's on. This will need to match exactly for the flag to work.
We recommend building the flag on the dev site first for you to test before creating it on the live site, so no accidental flags are thrown on the live site.

Comments
0 comments
Article is closed for comments.